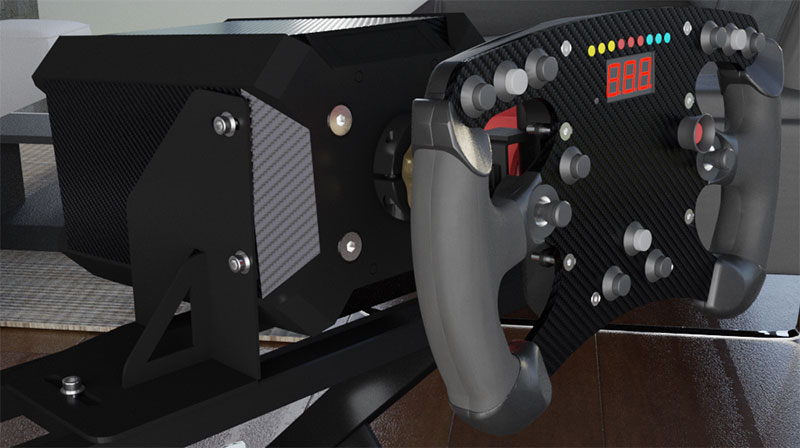
¶ Assembling the Simulator
To be able to ship the RacingCUBE effective and securely we need to disassemble a few parts for the journey. Do not worry, it is quite simple, and we are providing you with the tools needed for assembly. It should take 2 - 4 hours the first time you assemble it.
Bolts can either be black or chrome. It depends on the model.
¶ Video Assembly Manual
This manual was made for the older RC4v3 platform and can deviate from the platform you have. If you are in doubt please consult with the written manual.
This video manual features cable management, which can still be used for the CRB & PRO models along with most of the process.
¶ Written Assembly Manual
If you prefer a written Assembly Manual you can continue below. The manual has been adjusted to fit the newest platform which is the RC4-CRB and RC4-PRO, if you have an older model please go HERE.
¶ Assembling of the rotation plate
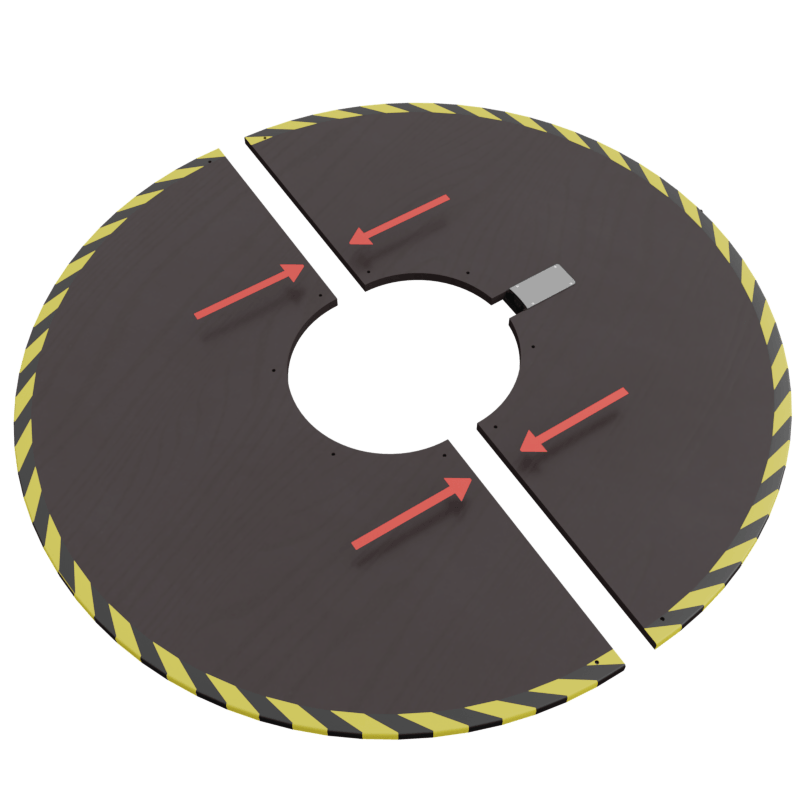
The rotation plate is used to keep the RC4 in place while rotating. To be able to ship the plate it has been cut into two pieces that needs to be bolted together.
-
Place the rotation plate on the floor where you want the RacingCUBE to be. Slide the pieces together and make sure it is placed on a suitable surface.
-
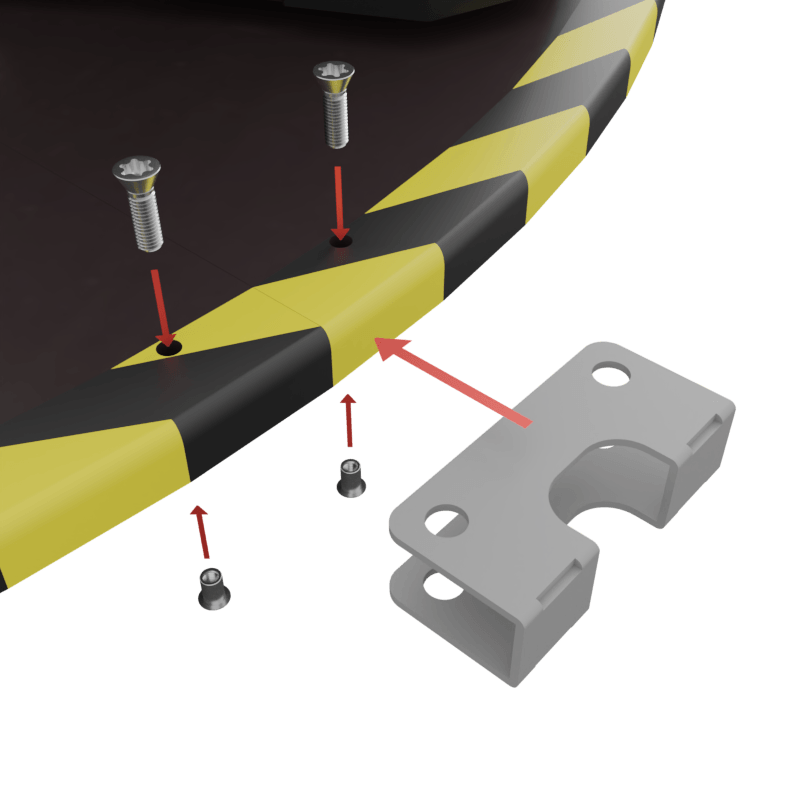
Use the included brackets and the
[P09]bolts and[P21]inserts to fasten the two plates. Do not thighten the bolts just yet.
-
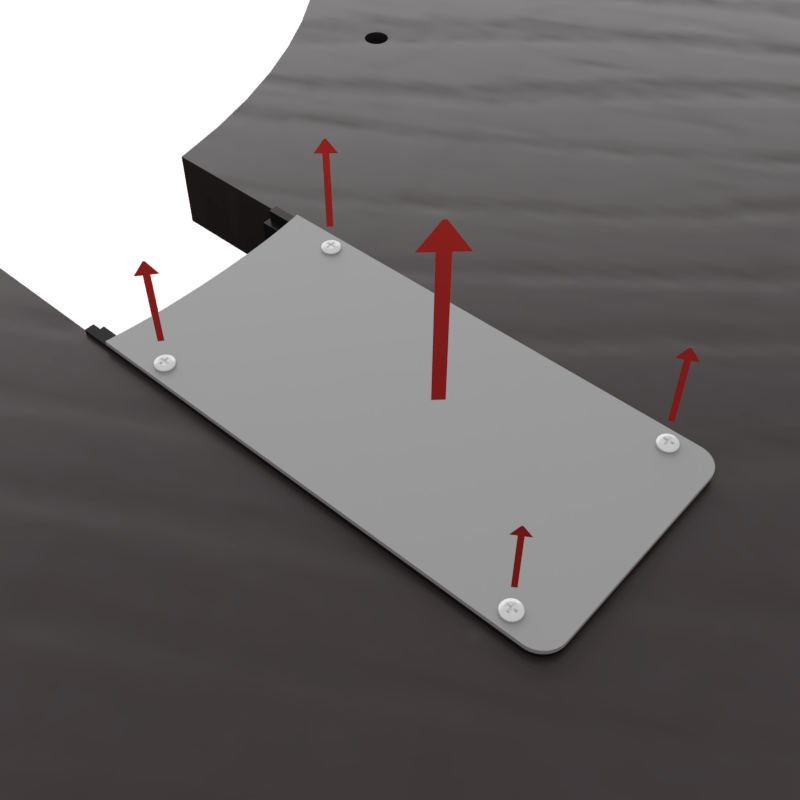
Take off the lid, here we can run the power line.
-
Take the power cable and run it under the rotation module. pull it shrough as shown and let it stay for now.
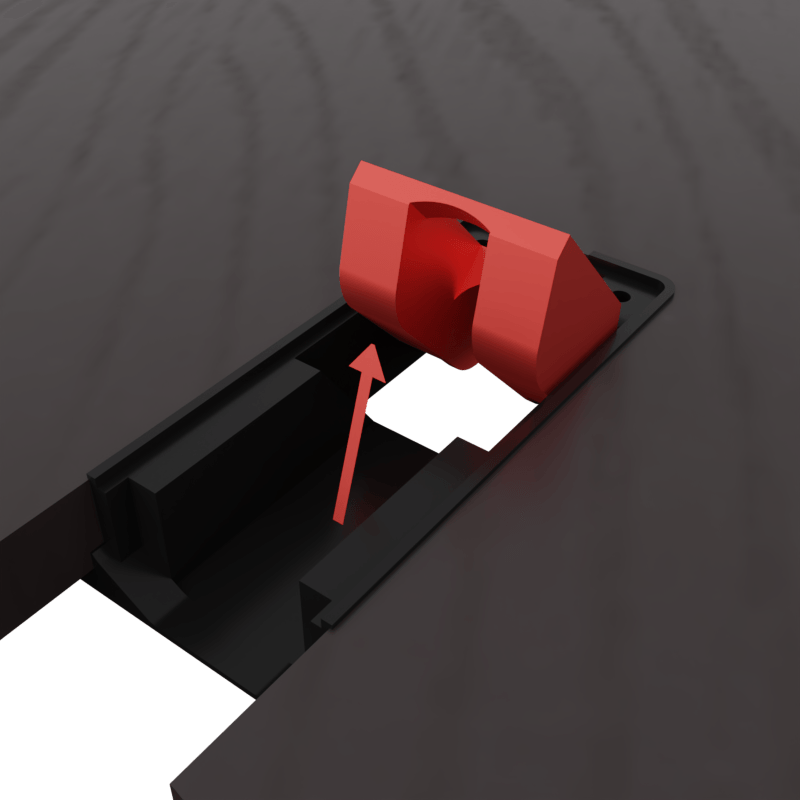
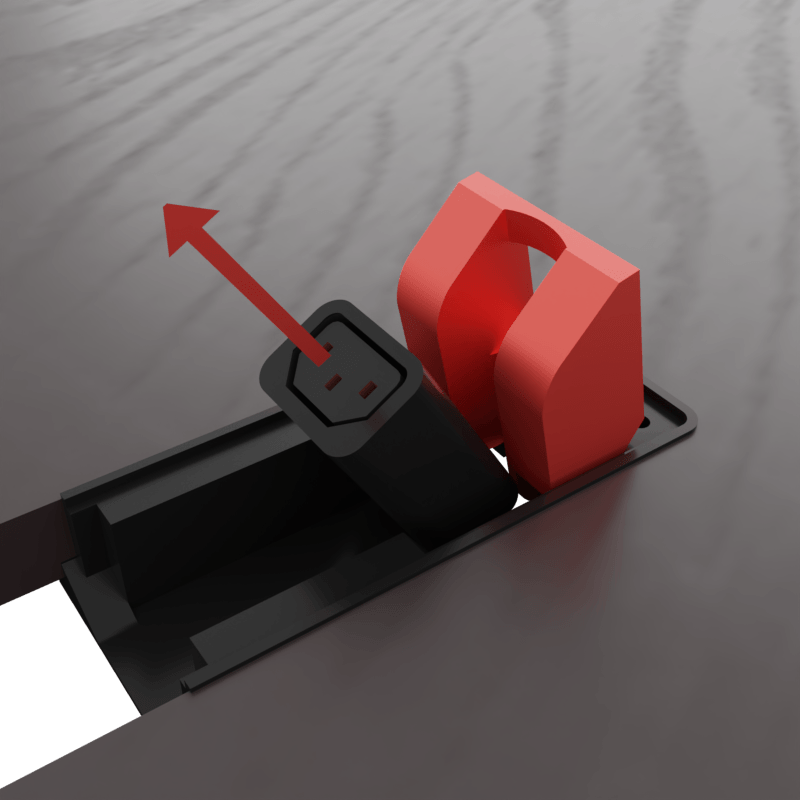
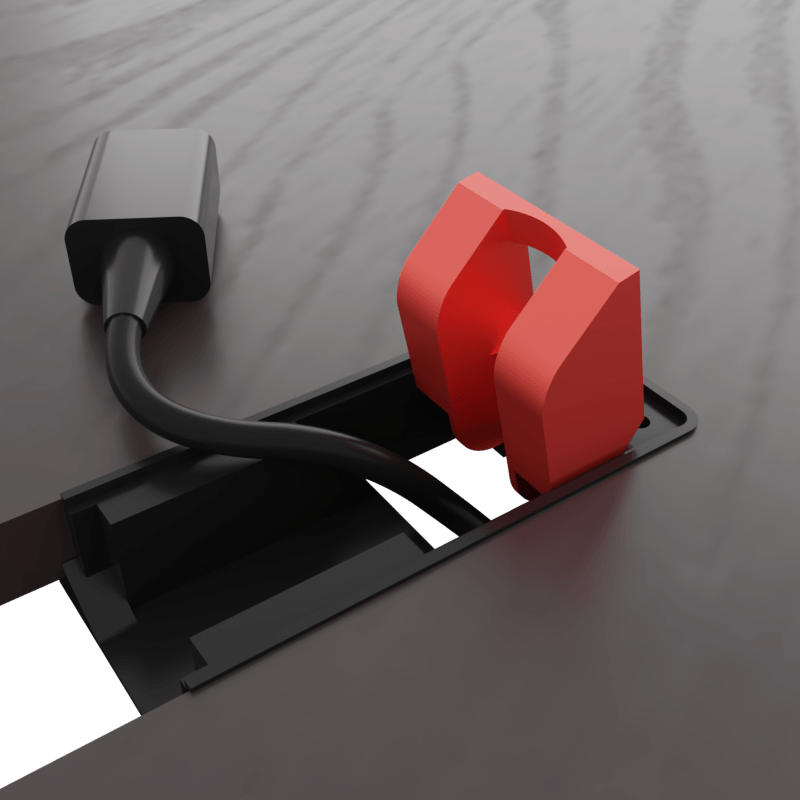
-
Place the Base Motion Module in the middle of the rotation plate and allign the holes. Make sure the connector allign as well as shown in the picture.
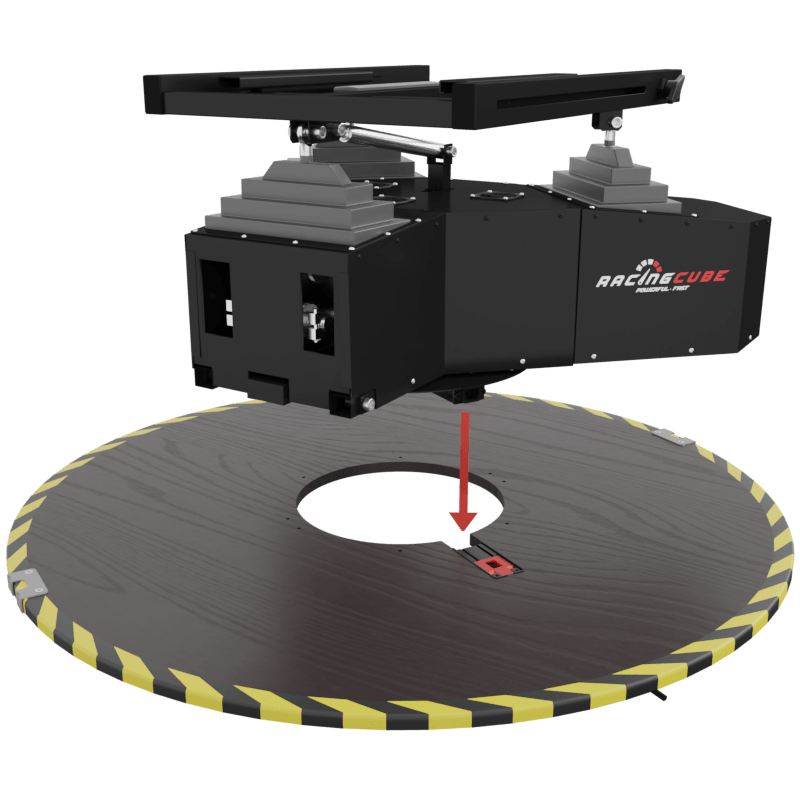
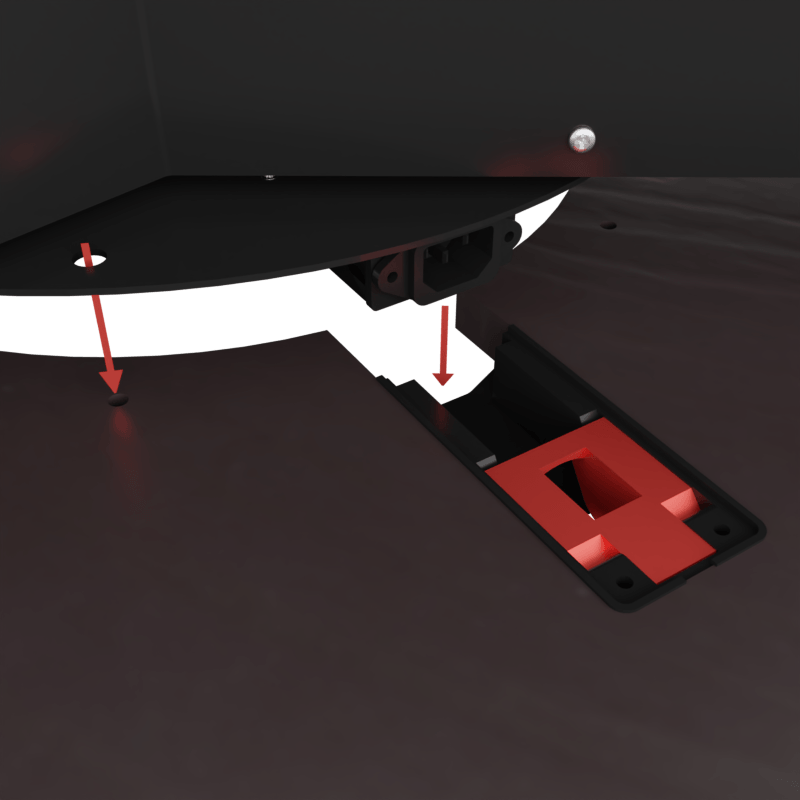
-
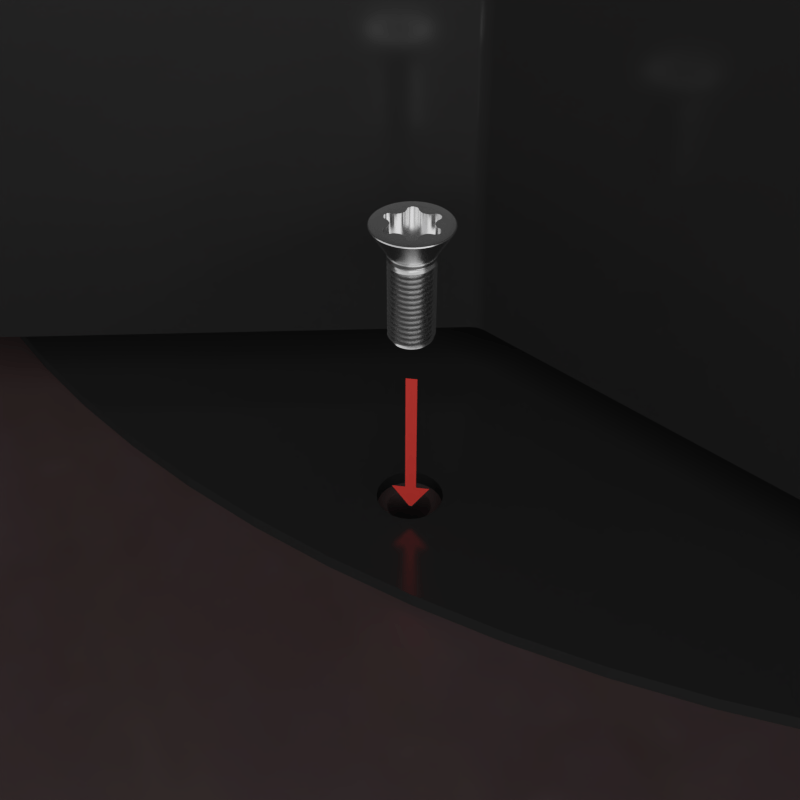
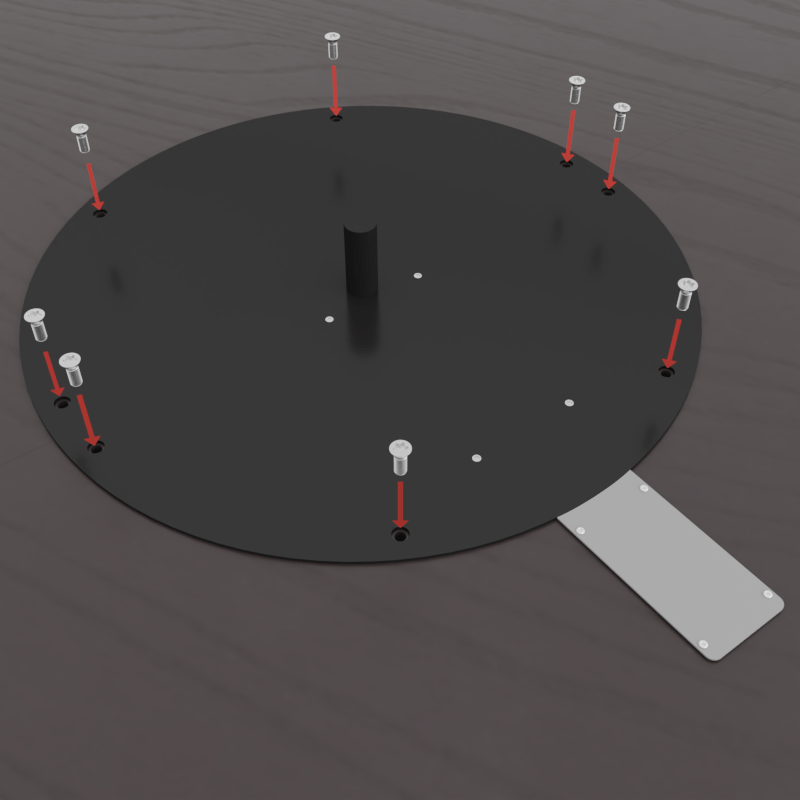
Fasten all screws using
P9bolts. You will need to rotate the Base Module in order to secure all 8 bolts.
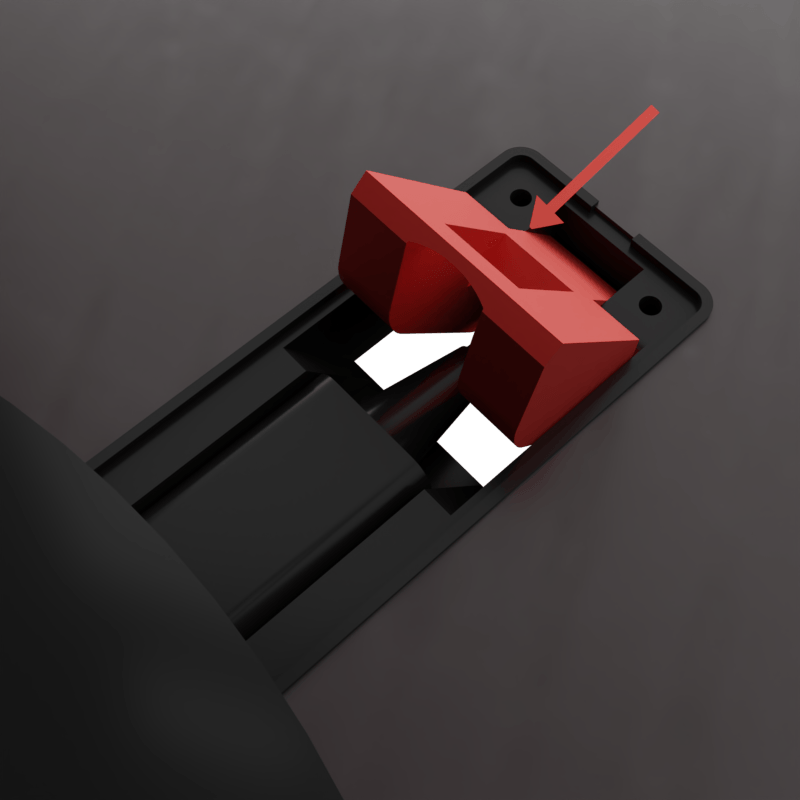
Make sure to press down the red lever before you rotate the Base Module. There will be space for the wire.
-
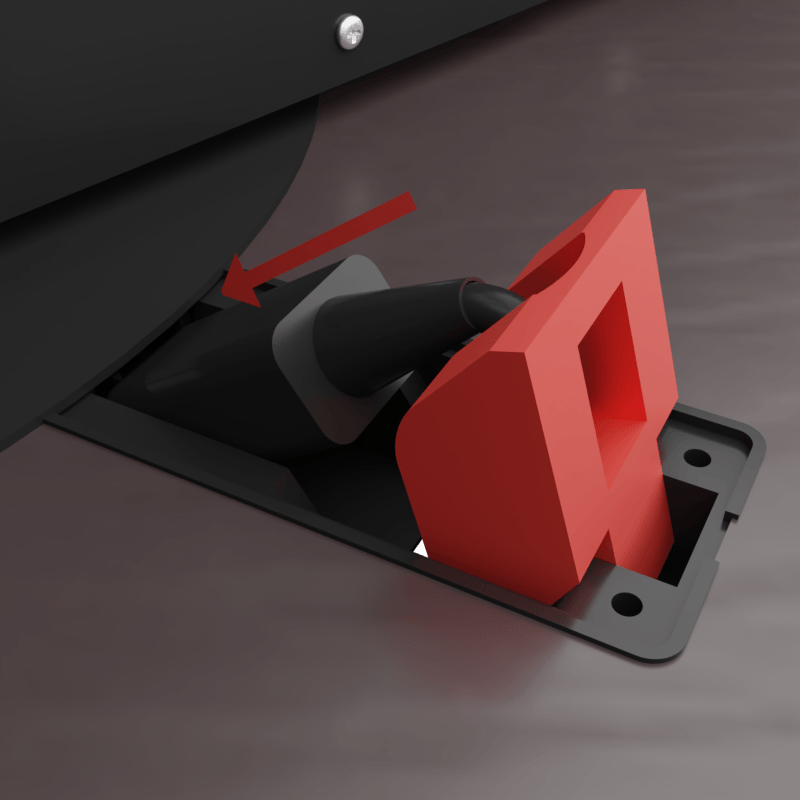
Plug the connector into the Base Module and close the red lever. Make sure the connection is good.
-
Install the lid again as shown.
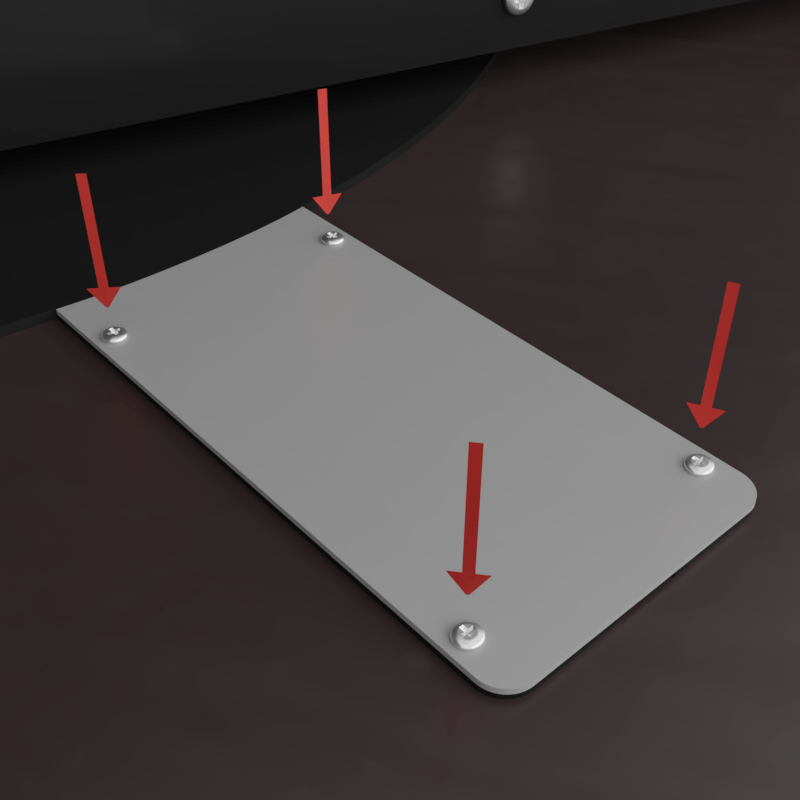
Before assembling the rest of the simulator, it is recommended to place the rotation plate where you intent to place it after assembling. Once you have found a good spot, place the simulator base on the rotation plate and continue assembling.
We always recommend using a protective mat below the simulator as it can leave marks on the floor. There is a lot of force applied to the feet under the rotation plate while the machine is in operation.
You can continue to next step.
¶ Rotation Module (RC4-CRB/PRO)
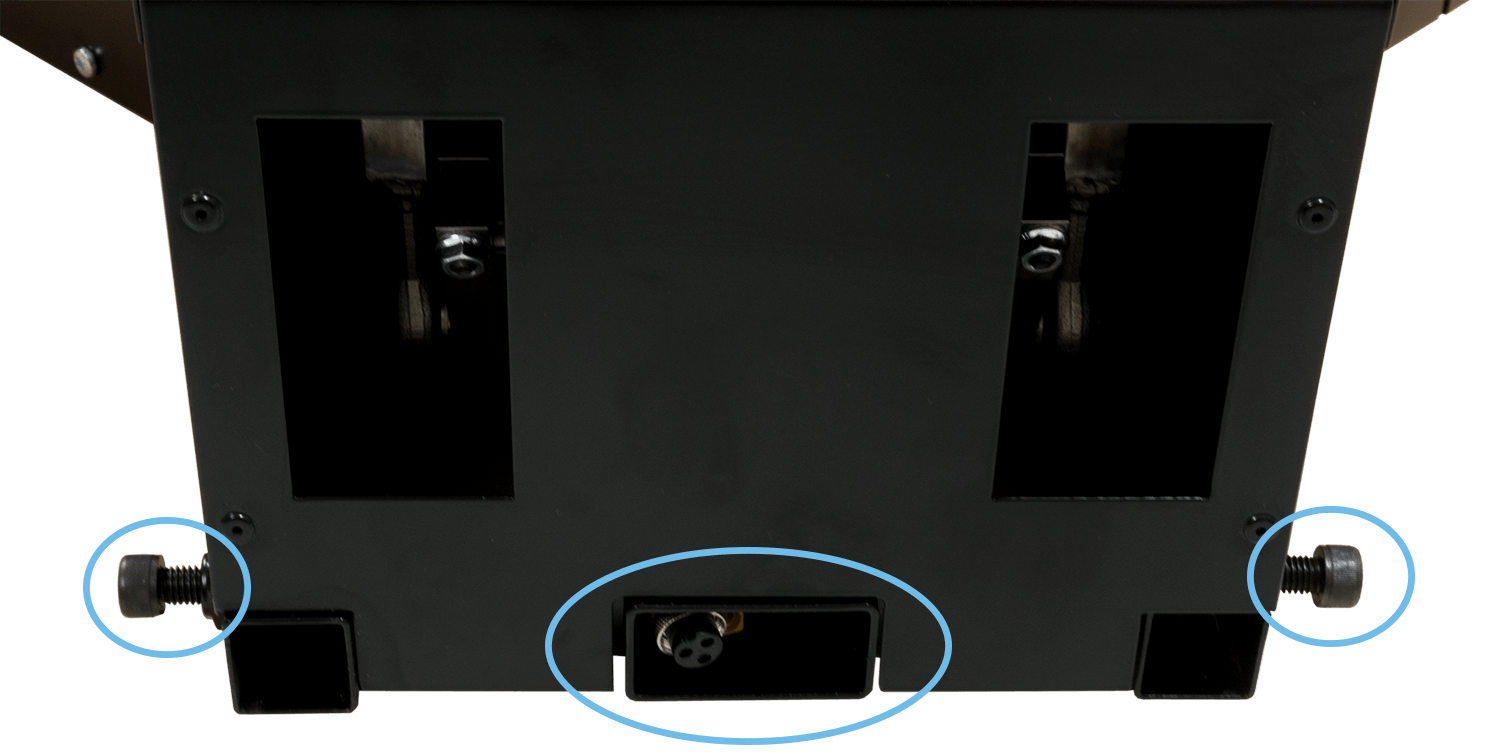
It is recommended to find an object to slide under the base to lift it slightly. Once the simulator has been lifted you can attach the rotation module, before sliding it into place make sure you attach the cables. They should go through the hole showed in the picture. Use [P02] bolts on the side.
Step 1 – Place the rotation module in the slider as showed and connect the connectors, ensure everything is tight and connected properly. The hole on the rotation module is quite small, it is to ensure the cables will not get in the way for the actuators. (There is a hole for each cable on the newest models).
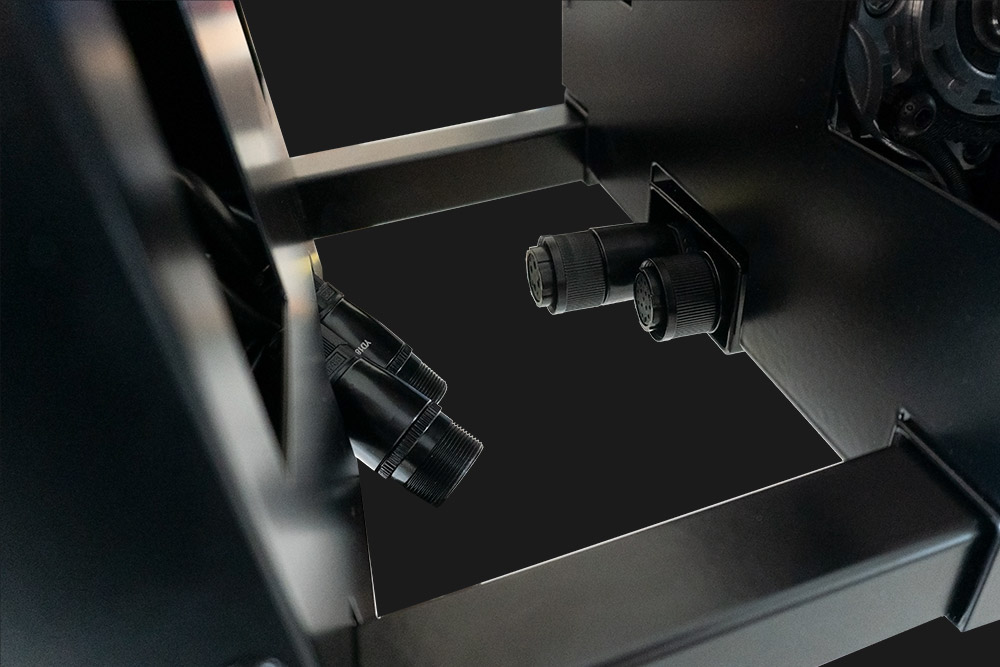
Step 2 – All connectors and cable should go into the rotation module or main unit to ensure wires are clear of obstacles. You might need to get access to the rotation module from below to be able to attach the connectors. Make sure no cables will get run over or get in the way of the actuators while in operation.
Make sure to connect the right connectors to each other to prevent pin damage.
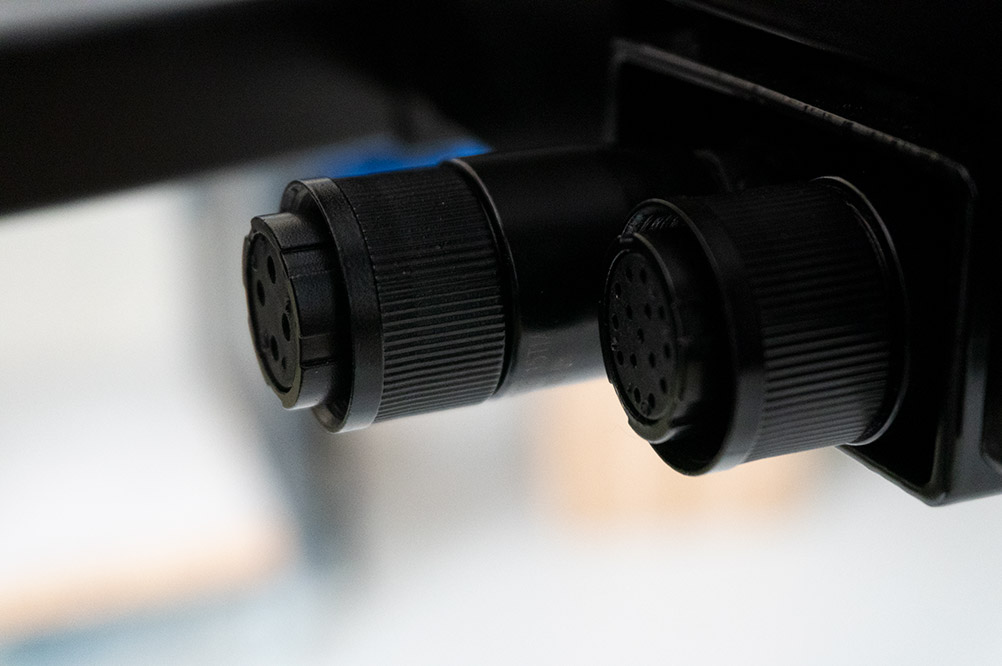
Both cables MUST be connected before use, if not done so the calibration can fail and the rotation module will rotate.
Step 3 – Pictured below you can see the data connector and power connector for the RC4. Attach the two [P02] bolts as showed on the picture. Before tightening the screws make sure the simulator is places on a plain surface.
¶ Lower Frame (RC4-CRB/PRO)
The frame should be mounted before mounting foot support and steering wheel support. Make sure all screws/finger screws should face outwards off the simulator.
Use [P15] to attach the V-Frame to the base and use another [P15] or a 40mm bolt to attach the steering wheel frame.
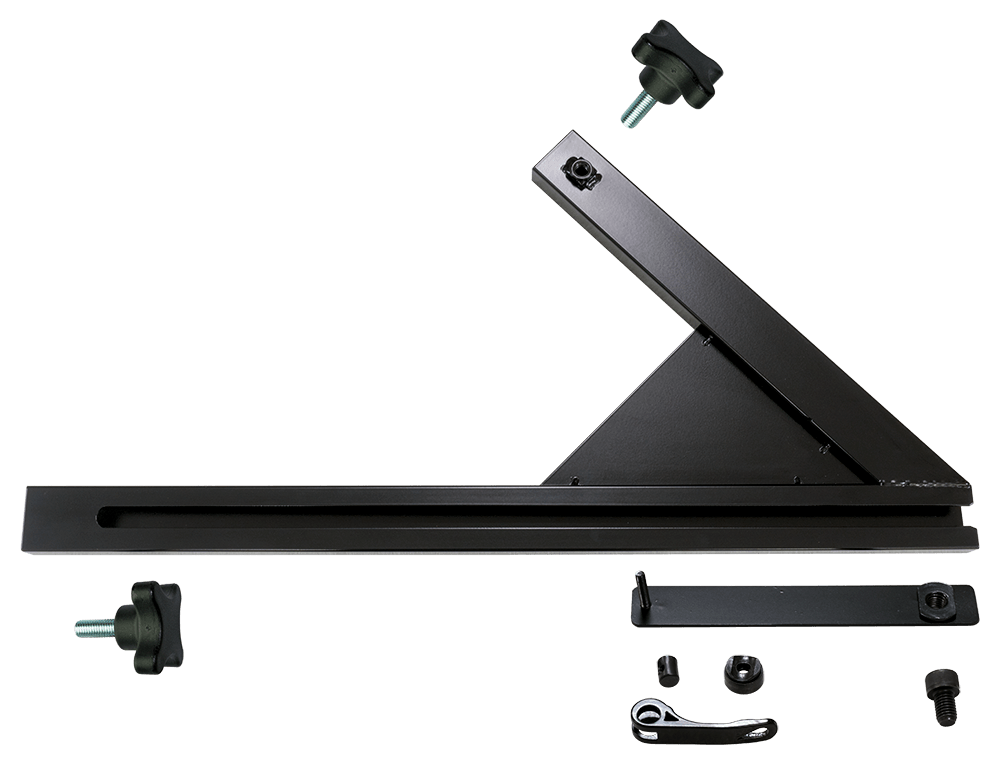
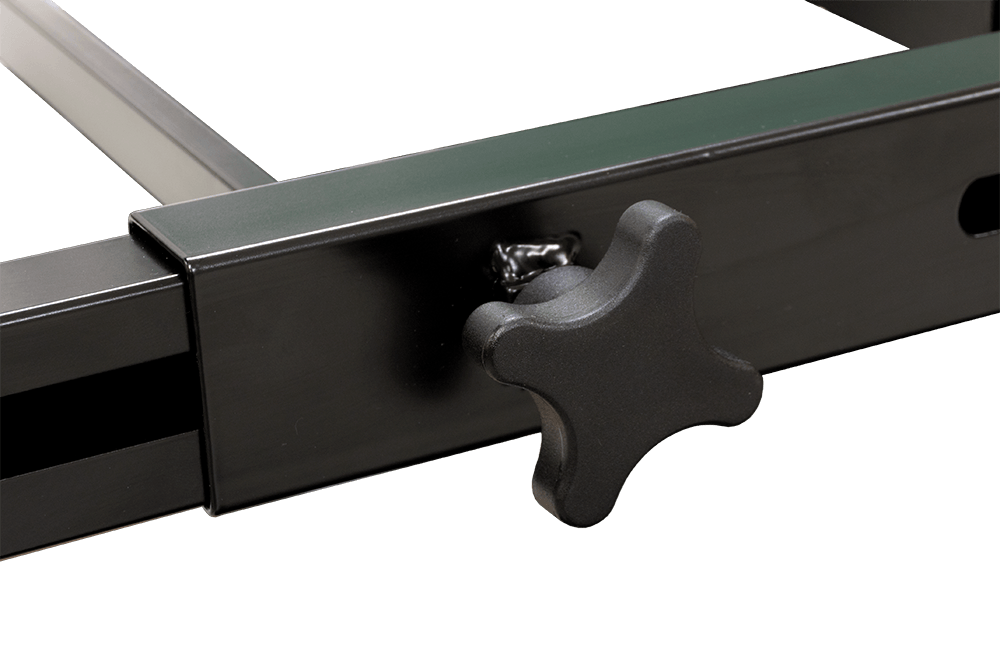
The version depends on whether you have gotten one or two pairs of hand knobs. Please use the correct item and make sure to tighten it properly.
Use the provided hand knobs to fasten the V-Frame to the base. Make sure to fasten it enough to prevent it from sliding while in use. The designated hole with a nut in it is designed for the thumb screw or a 40mm bolt if you prefer.
¶ Foot Support (RC4-CRB/PRO)
Once you have attached the lower frame you can now begin to mount the foot support.
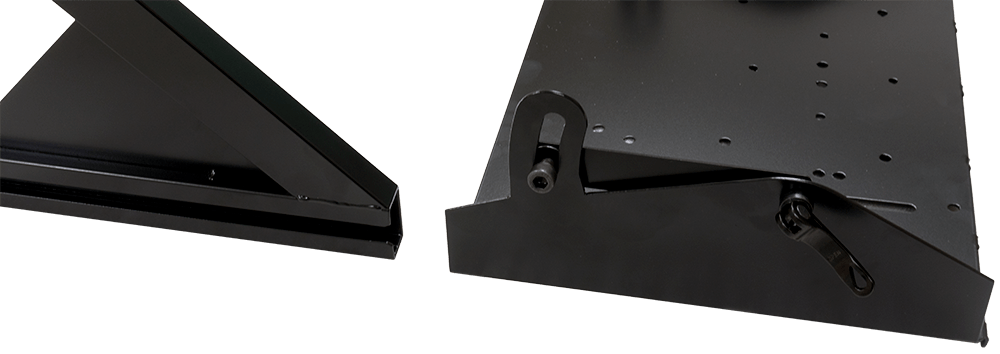
To mount the foot support, you need the [P02] Bolts and the included brackets. Mount the bracket on the foot support as showed on the picture above. Do not tighten the bolt and handle yet.
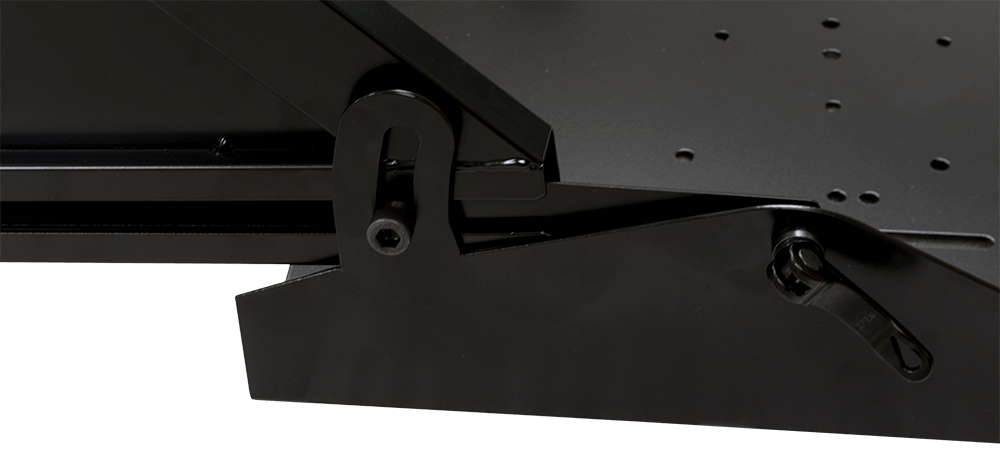
Once you have mounted the bracket you can slide the foot support into the V-Frame as showed above, you can adjust the foot support to your liking by using the slide to the left where the bolt is attached.
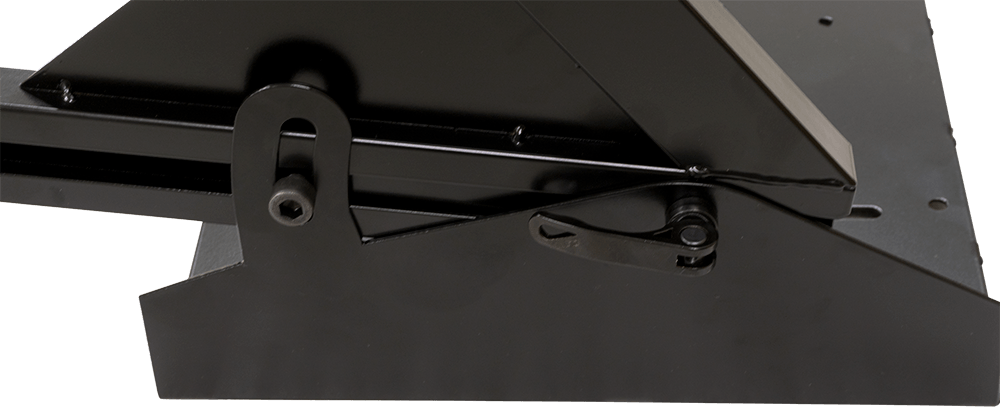
When you have found the desired placement for the foot support you can tighten the bolt and handle. With the upgraded design of the RC4v3 you can easily swap your foot support by loosening the handle and slide it out. This way you can change from car pedals to rudder pedals in no time!
¶ Steering Wheel Mount (RC4-CRB/PRO)
The steering wheel mount is quite easy to attach, just slide it into place and tighten the included thumb screws [P15].
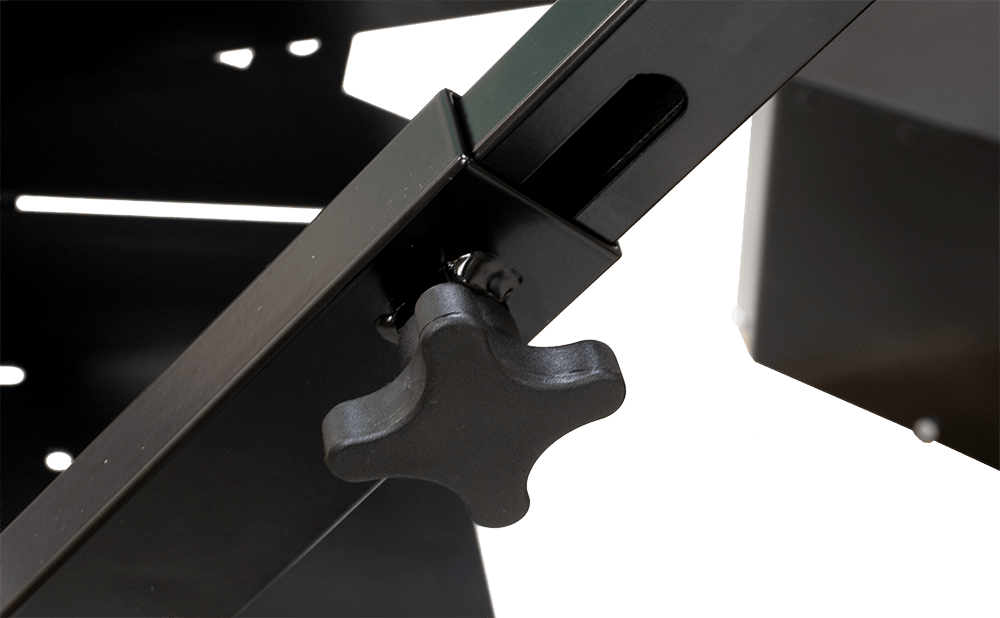
The bracket plate is used to mount the steering wheel, you can slide it to the desired position. Use [P06], [P10], [P11] to attach it to the frame. We also provide bolts for Logitech and Thrustmaster wheels, use [P04] bolts.
The AIO mount supports a variety of different manufactures. Please consult our FAQ page to see if your equipment fits.
¶ Seat Mount
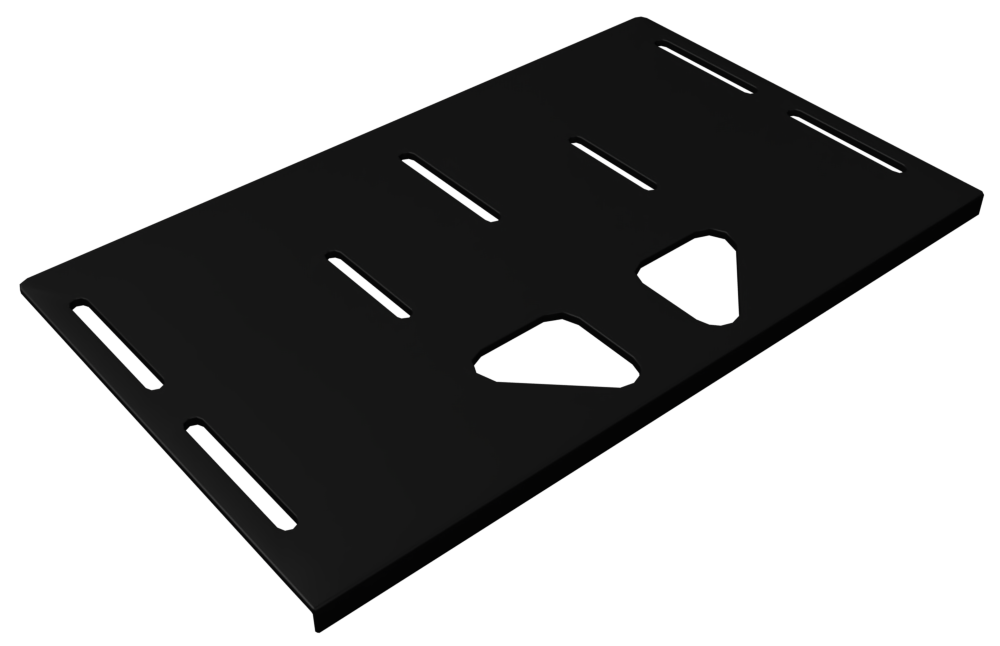
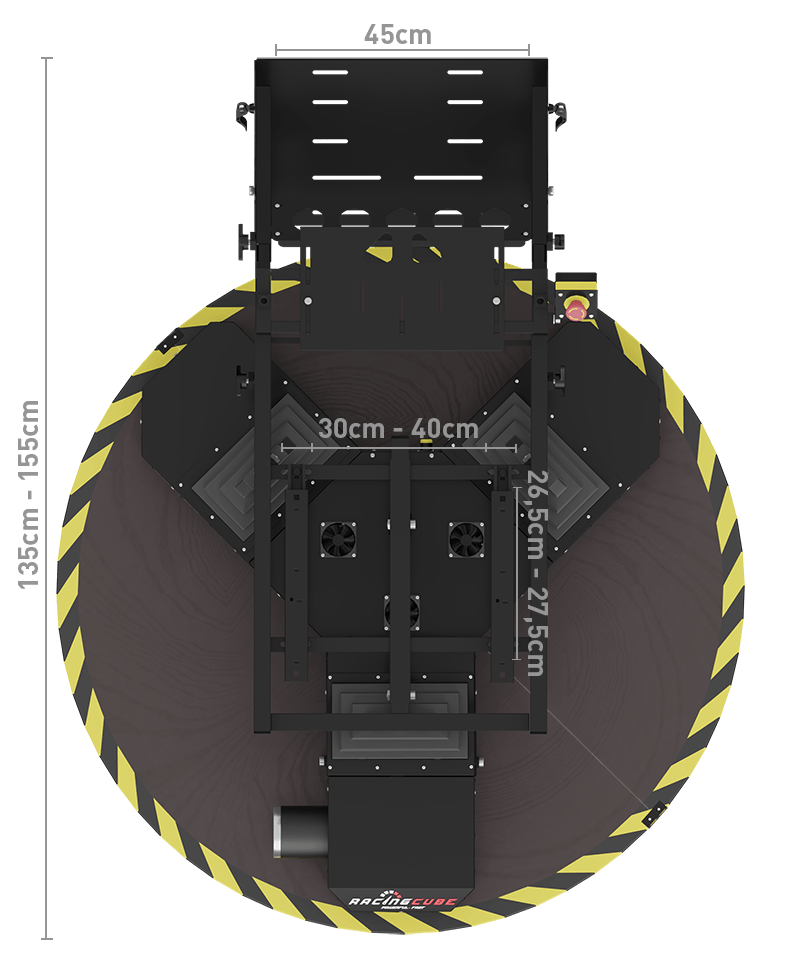
The seat slider supports most standard seats on the market. If you are unsure your seat fits, please consult the manufacturer regarding mounting measurements. You can see ours on the image below. Some configurations will have bolts included [P01] [P10].
The bolts fastening the seat slider to the frame have NOT been tightened as you might have to adjust to fit your seat.
¶ Control Panel (RC4-CRB)
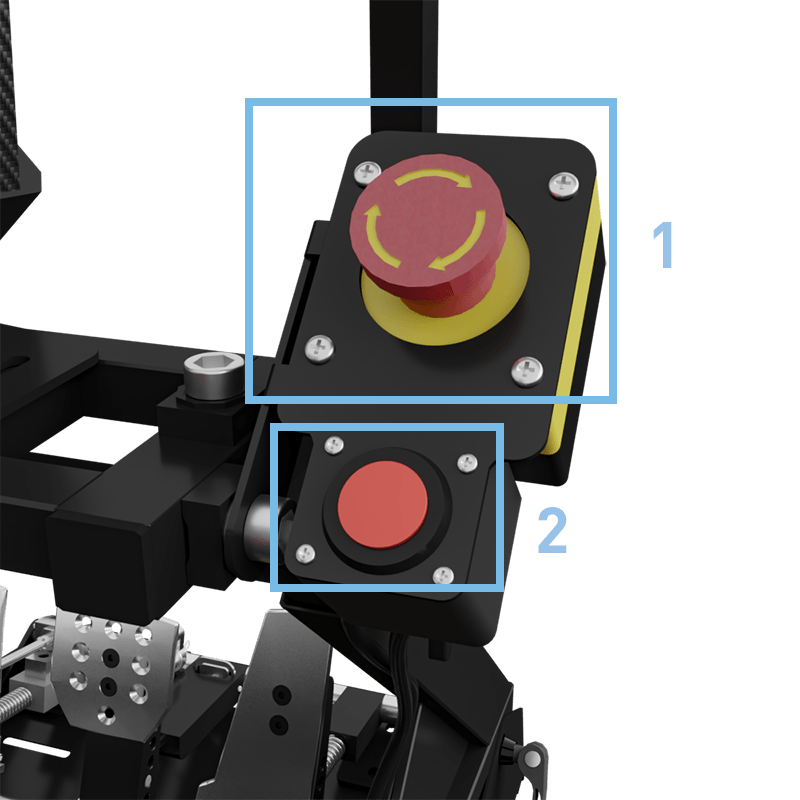
On the panel you will find the emergency stop (Top) and the park button (bottom). These two have slight different use but both need to be easily accessible.
-
Emergency stop - Used to turn on/off the whole platform.
-
Park button - Used to park the simulator if you need it to not move regardless of game input. When parking the simulator all actuators will go down in park position. Unparking the motors will start calibration of the feedback system and put it in ready position. Rotation module is not affected but will park.
¶ Control Panel (RC4-PRO)
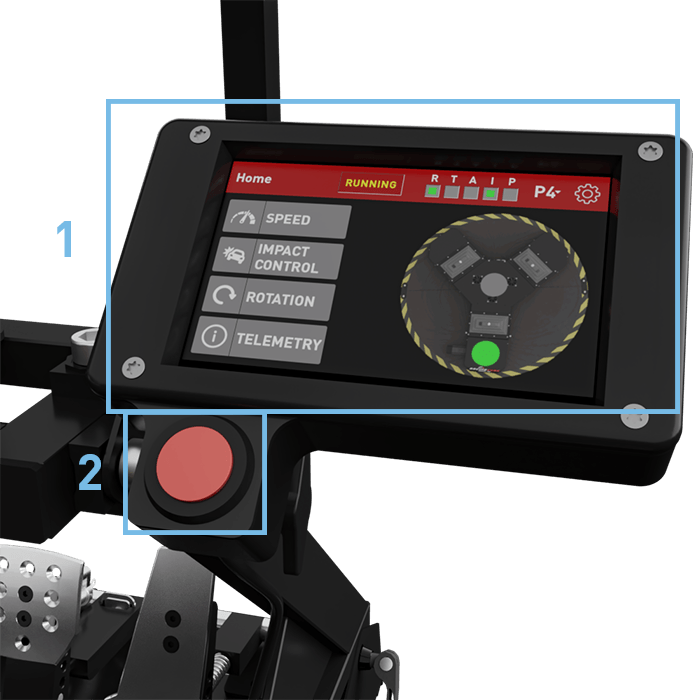
On the PRO model you will find our brand new interactive touch display. This helps you to interact directly with the sim and adjust motor speed, crash control and monitor the system. Additionally you will find the park button below and the emergency stom on the left of the simulator.
-
Interactive Display - Used to control the simulator and monitor it. See the full manual about it HERE.
-
Park button - Used to park the simulator if you need it to not move regardless of game input. When parking the simulator all actuators will go down in park position. Unparking the motors will start calibration of the feedback system and put it in ready position. Rotation module is not affected but will park.
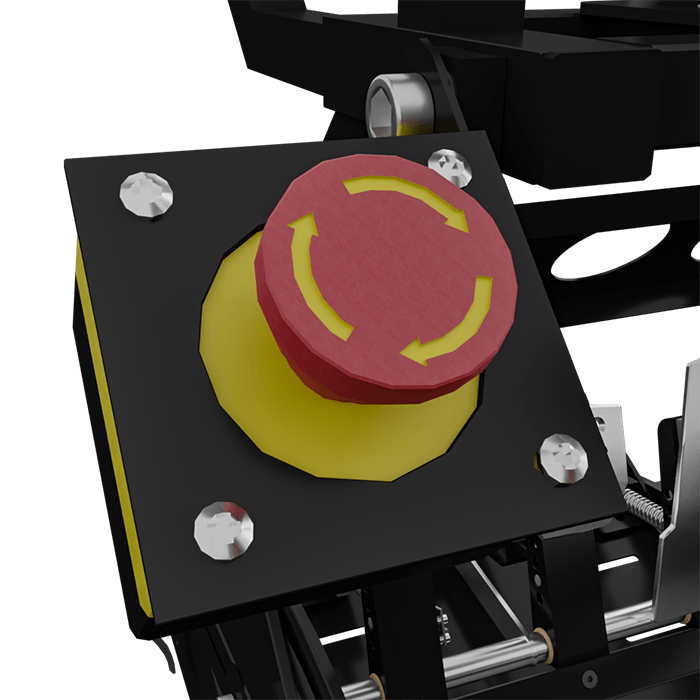
Emergency stop - Used to turn on/off the whole platform.
¶ Finishing Assembly
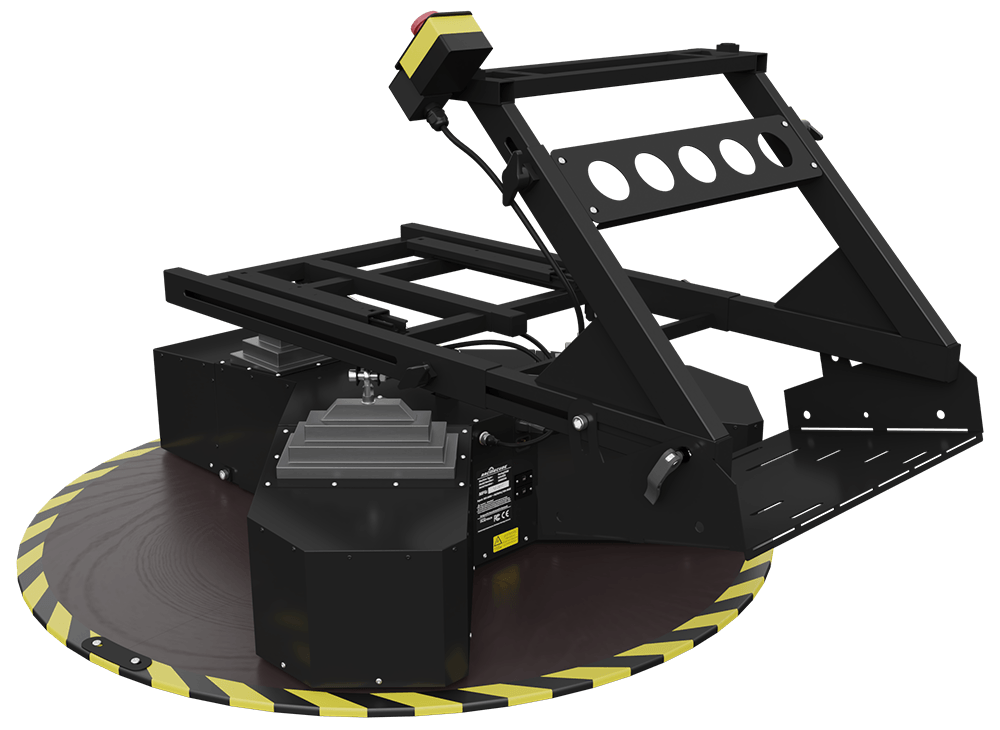
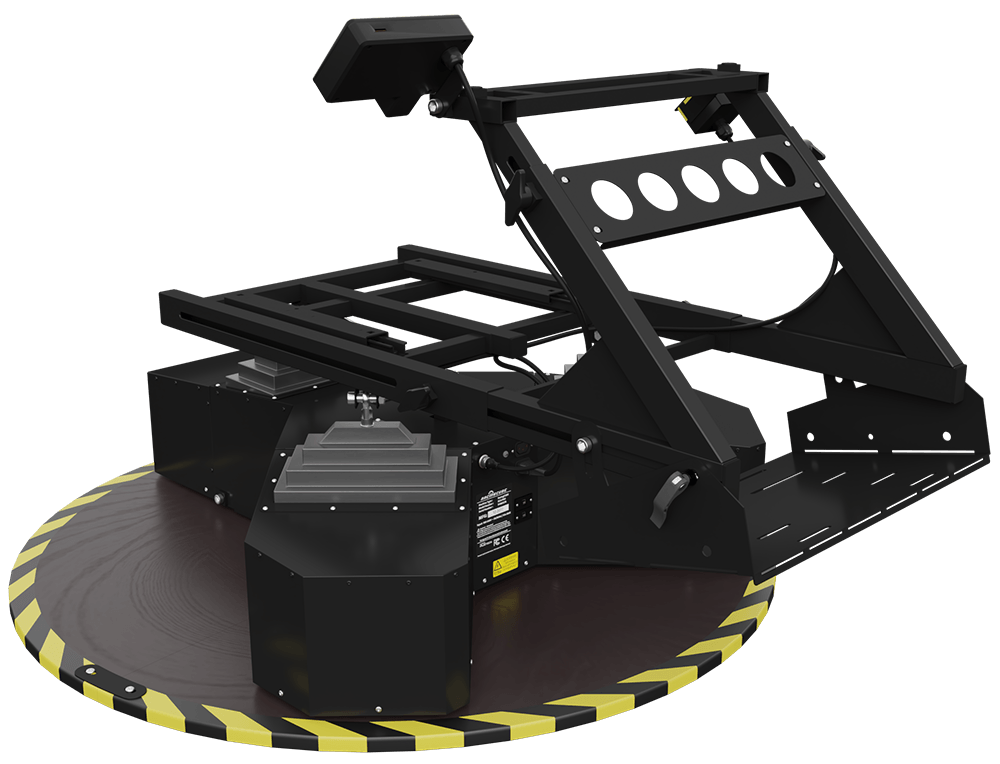
As the simulator offers modularity and the use of your own gear, we cannot manage most of the cables beforehand. Beneath the seat is plenty of room for excess cables and a power strip and maybe an extra USB Hub if you need it. The management of cables to various places is usually done with Velcro or zip ties depending on the location. On the website you can see pictures of how we manage cable and to the left is a picture of the model without accessories for reference.
¶ Connecting the PC (RC4-CRB)
To connect the simulator to your computer just plug in the long USB cable provided. Only one cable is required to operate the simulator and it should go into the USB-B connector. To proceed with the installation of the software please continue with the SimTools Guide.
¶ Connecting the PC (RC4-PRO)
The PRO model have two interfaces for USB connection as described HERE.
You need to connect the TOP USB first (S-Drive Telemetry) and then the BOTTOM USB second (GameDash Connection) By doing that, you know which COM ports to use in GameDash and SimTools.
¶ Connecting and installing Pre-built PC's to the Simulator
If you have bought a computer through our web shop, SimTools will be located as an installer on the desktop. You will need to install SimTools yourself and follow the on-screen instructions to configure the software. Please see our software section as well.
Installing is pretty easy, just place it in the mount and connect it.
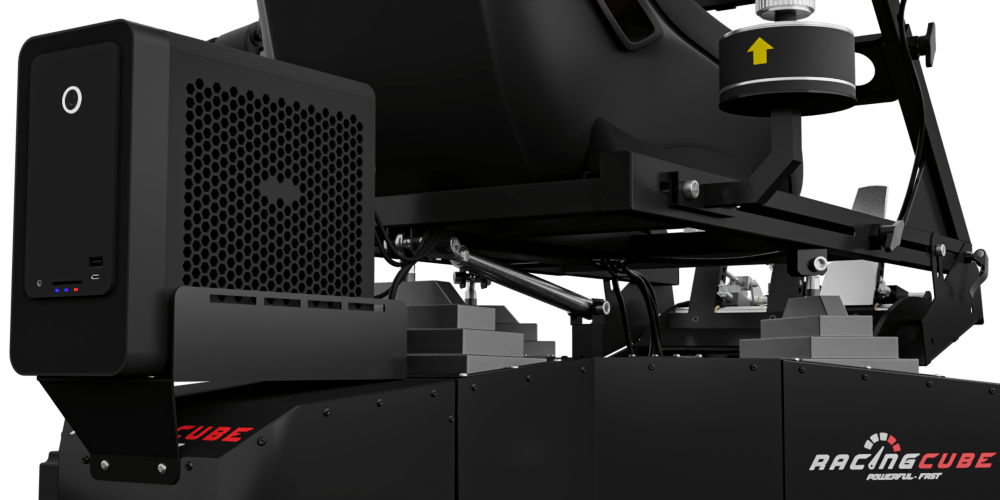
Be sure to make room for the seat while sliding it back and the cables on the back on the computer. They can collise if you place the computer too close to the seat.
¶ Calibrating the Simulator Before First Use
The simulator works by lifting you with three actuators, in order to give you the best experience and distribute the load it is important you balance the simulator. To balance it please use the different methods of adjustments described further down in this guide.
The center of balance should be in the center of the three actuators, meaning there should no more or less at the front or back of the simulator. A perfect balance can be hard to achieve and is not necessary, but a relative balance will improve performance drastically. If multiple people with a big difference in weight or weight distribution will be using the simulator, we recommend using the seat slider and the slider with hand knobs at the lower frame.
¶ Front Panel (RC4-CRB)
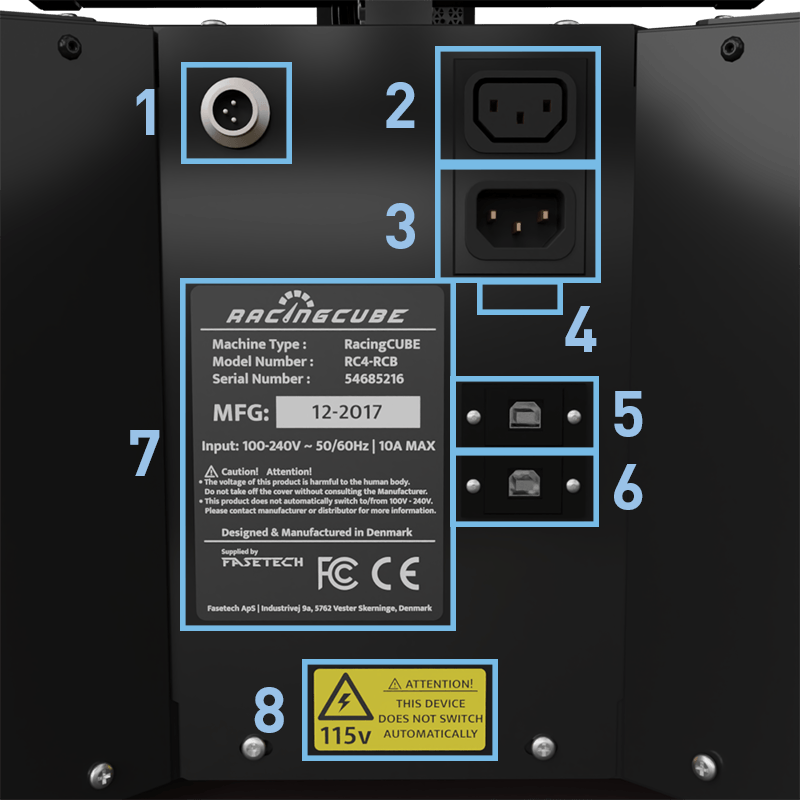
At the front of the Base Platform you find the Front Panel, here you find I/O and other usefull information. On the picture you can see what the different connectors do and what to use them for.
-
Park button - Connector for the parkbutton.
-
Emergency stop connector, used to power off the system or shut it down in an emergency. The system cannot work without this plugged in, for security reasons.
-
Power connector for powering the whole system.
-
10Amp fuse.
-
Telemetry connection (Motion) - USB-B to USB-A for connecting the simulator to your computer.
-
Dash connection. Not used on the RC4-CRB but can be upgraded to PRO and display.
-
ticker showing technical information, manufacturing date and serial number.
-
ticker showing the voltage configuration. (Voltage configuration can be changed, please contact us for more information)
¶ Front Panel (RC4-PRO)
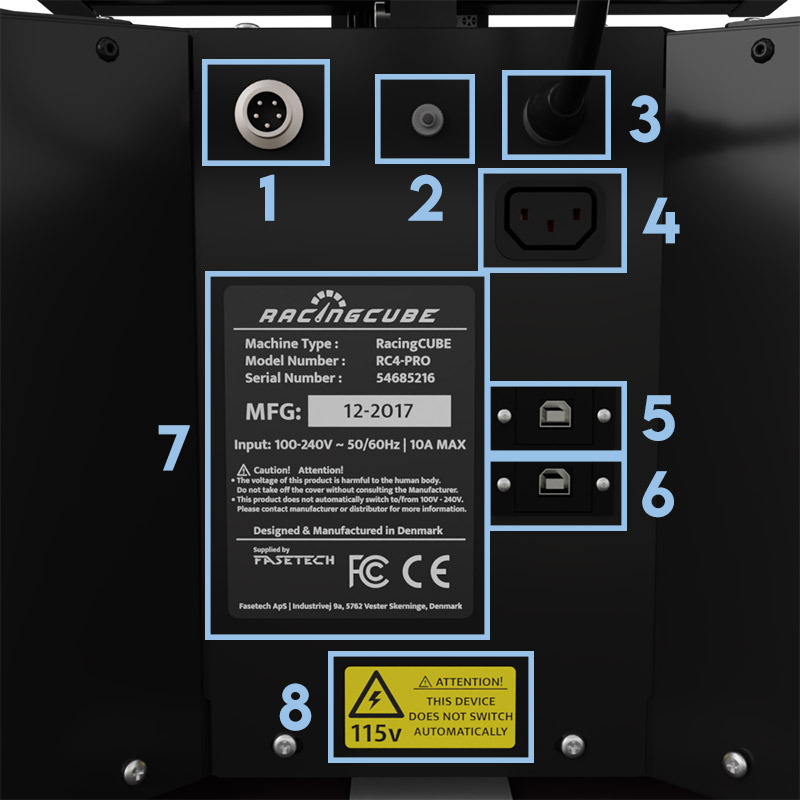
At the front of the Base Platform you find the Front Panel, here you find I/O and other useful information. On the picture you can see what the different connectors do and what to use them for.
-
Park / display connection. Used to power and send data to the display and park button.
-
10Amp fuse.
-
Power out for your accessories.
-
Emergency stop connector, used to power off the system or shut it down in an emergency. The system cannot work without this plugged in, for security reasons. Accessories are stil powered regardles.
North American systems will not have a power connector but a direct cord to the emergency stop.
-
Telemetry connection (Motion) - USB-B to USB-A for connecting the simulator to your computer.
-
Dash connection. Not used on the RC4-CRB but can be upgraded to PRO and display.
-
ticker showing technical information, manufacturing date and serial number.
-
ticker showing the voltage configuration. (Voltage configuration can be changed, please contact us for more information)
¶ Accessories
Accessories bought from our shop is compatible with the RC4 simulator. Mounting is quite easy by using the provided brackets; however, you can see how to attach it and adjust in the guides below. This section will be updated when new accessories is added.
¶ HOTAS
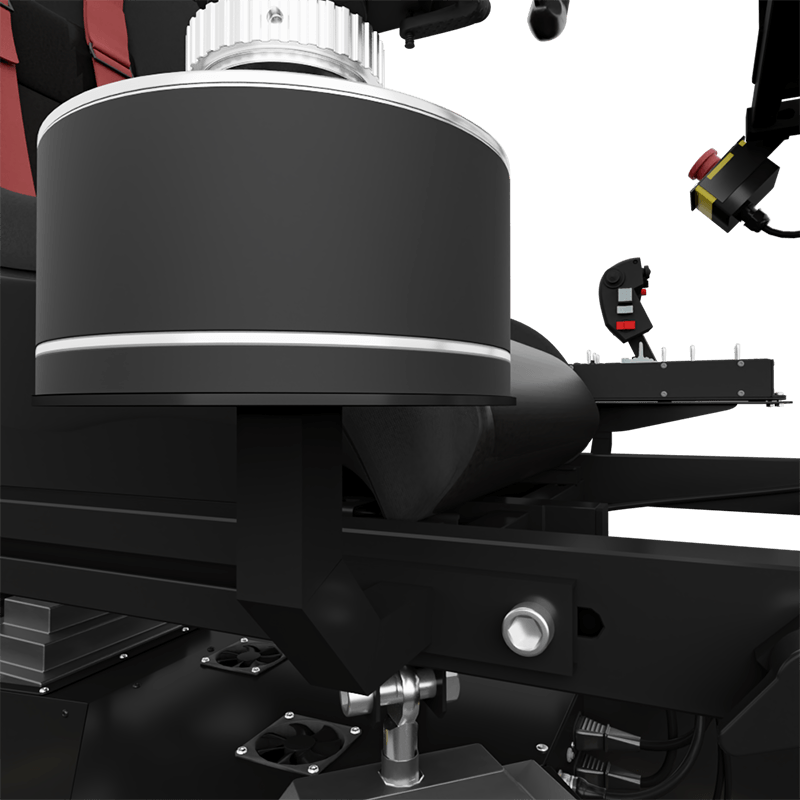
HOTAS mounts can be attached at the rail system on the side of the frame below the seat. It can be adjusted to the full extent of the rail system, meaning you can slide it all the way back once not in use. The rail system is used with the provided brackets. Use the [P03] bolts and the [P08] washers to fasten it as showed on the picture. The brackets go inside of the steel bar, to fasten it easily mount it from the rear of the simulator.
¶ Shifter Mount
The Shifter mount can be attached at the rail system on the side of the frame below the seat. It can be adjusted to the full extent of the rail system, meaning you can slide it all the way back once not in use. The rail system is used with the provided brackets. Use the [P03] bolts and the [P08] washers to fasten.
See the HOTAS picture above for an illustration, it uses the same mounting system.
¶ Monitor Stand
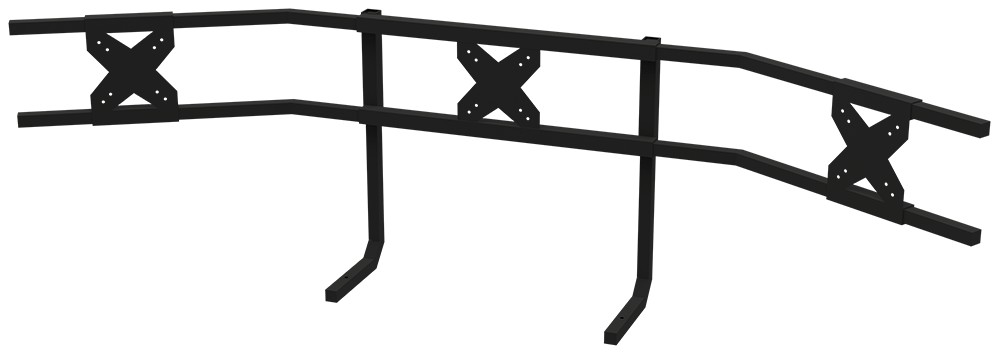
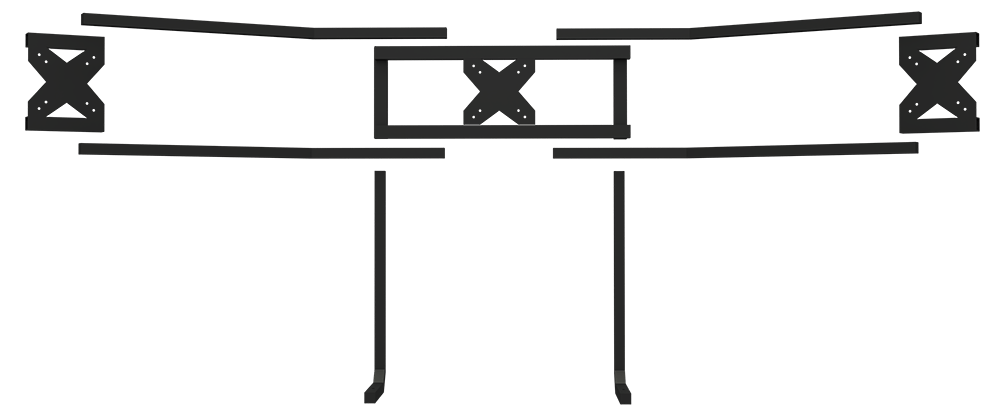
The screen mount is attached on the steering wheel support by using the [P02]. The [P02] bolts are used to secure the sliders and the height of the screen stand. We support a variety of screens, but the biggest is 1x 35" ultrawide screens.
We still offer limited support for 3x 27" screens. the "wings" seen on below picture is for those.
¶ Fanatec Podium Mount
We offer a custom Fanatec Podium mount that can be angled and moved back and forth. The mount can be used without the wheel plate mount that comes with the RC4.
You need P06, P10 & P11 to attach the mounts to the Steering Wheel Frame of the RC4. You can adjust them back and forth to your liking.
To attach the podium to the mounts, use P21 bolts and P22 washers.
